
Summary
This project aims to bring optical experiment quality light sources to the student budget. Featuring a material cost of approximately $100, its incredibly competitive with industry Xenon sources and has a slew of quality of life features.
The entire system revolves around the fact that HID headlights are essentially identical to expensive Xenon arc lamps at a fraction of the cost.
The system is built around the supporting electronics, and features:
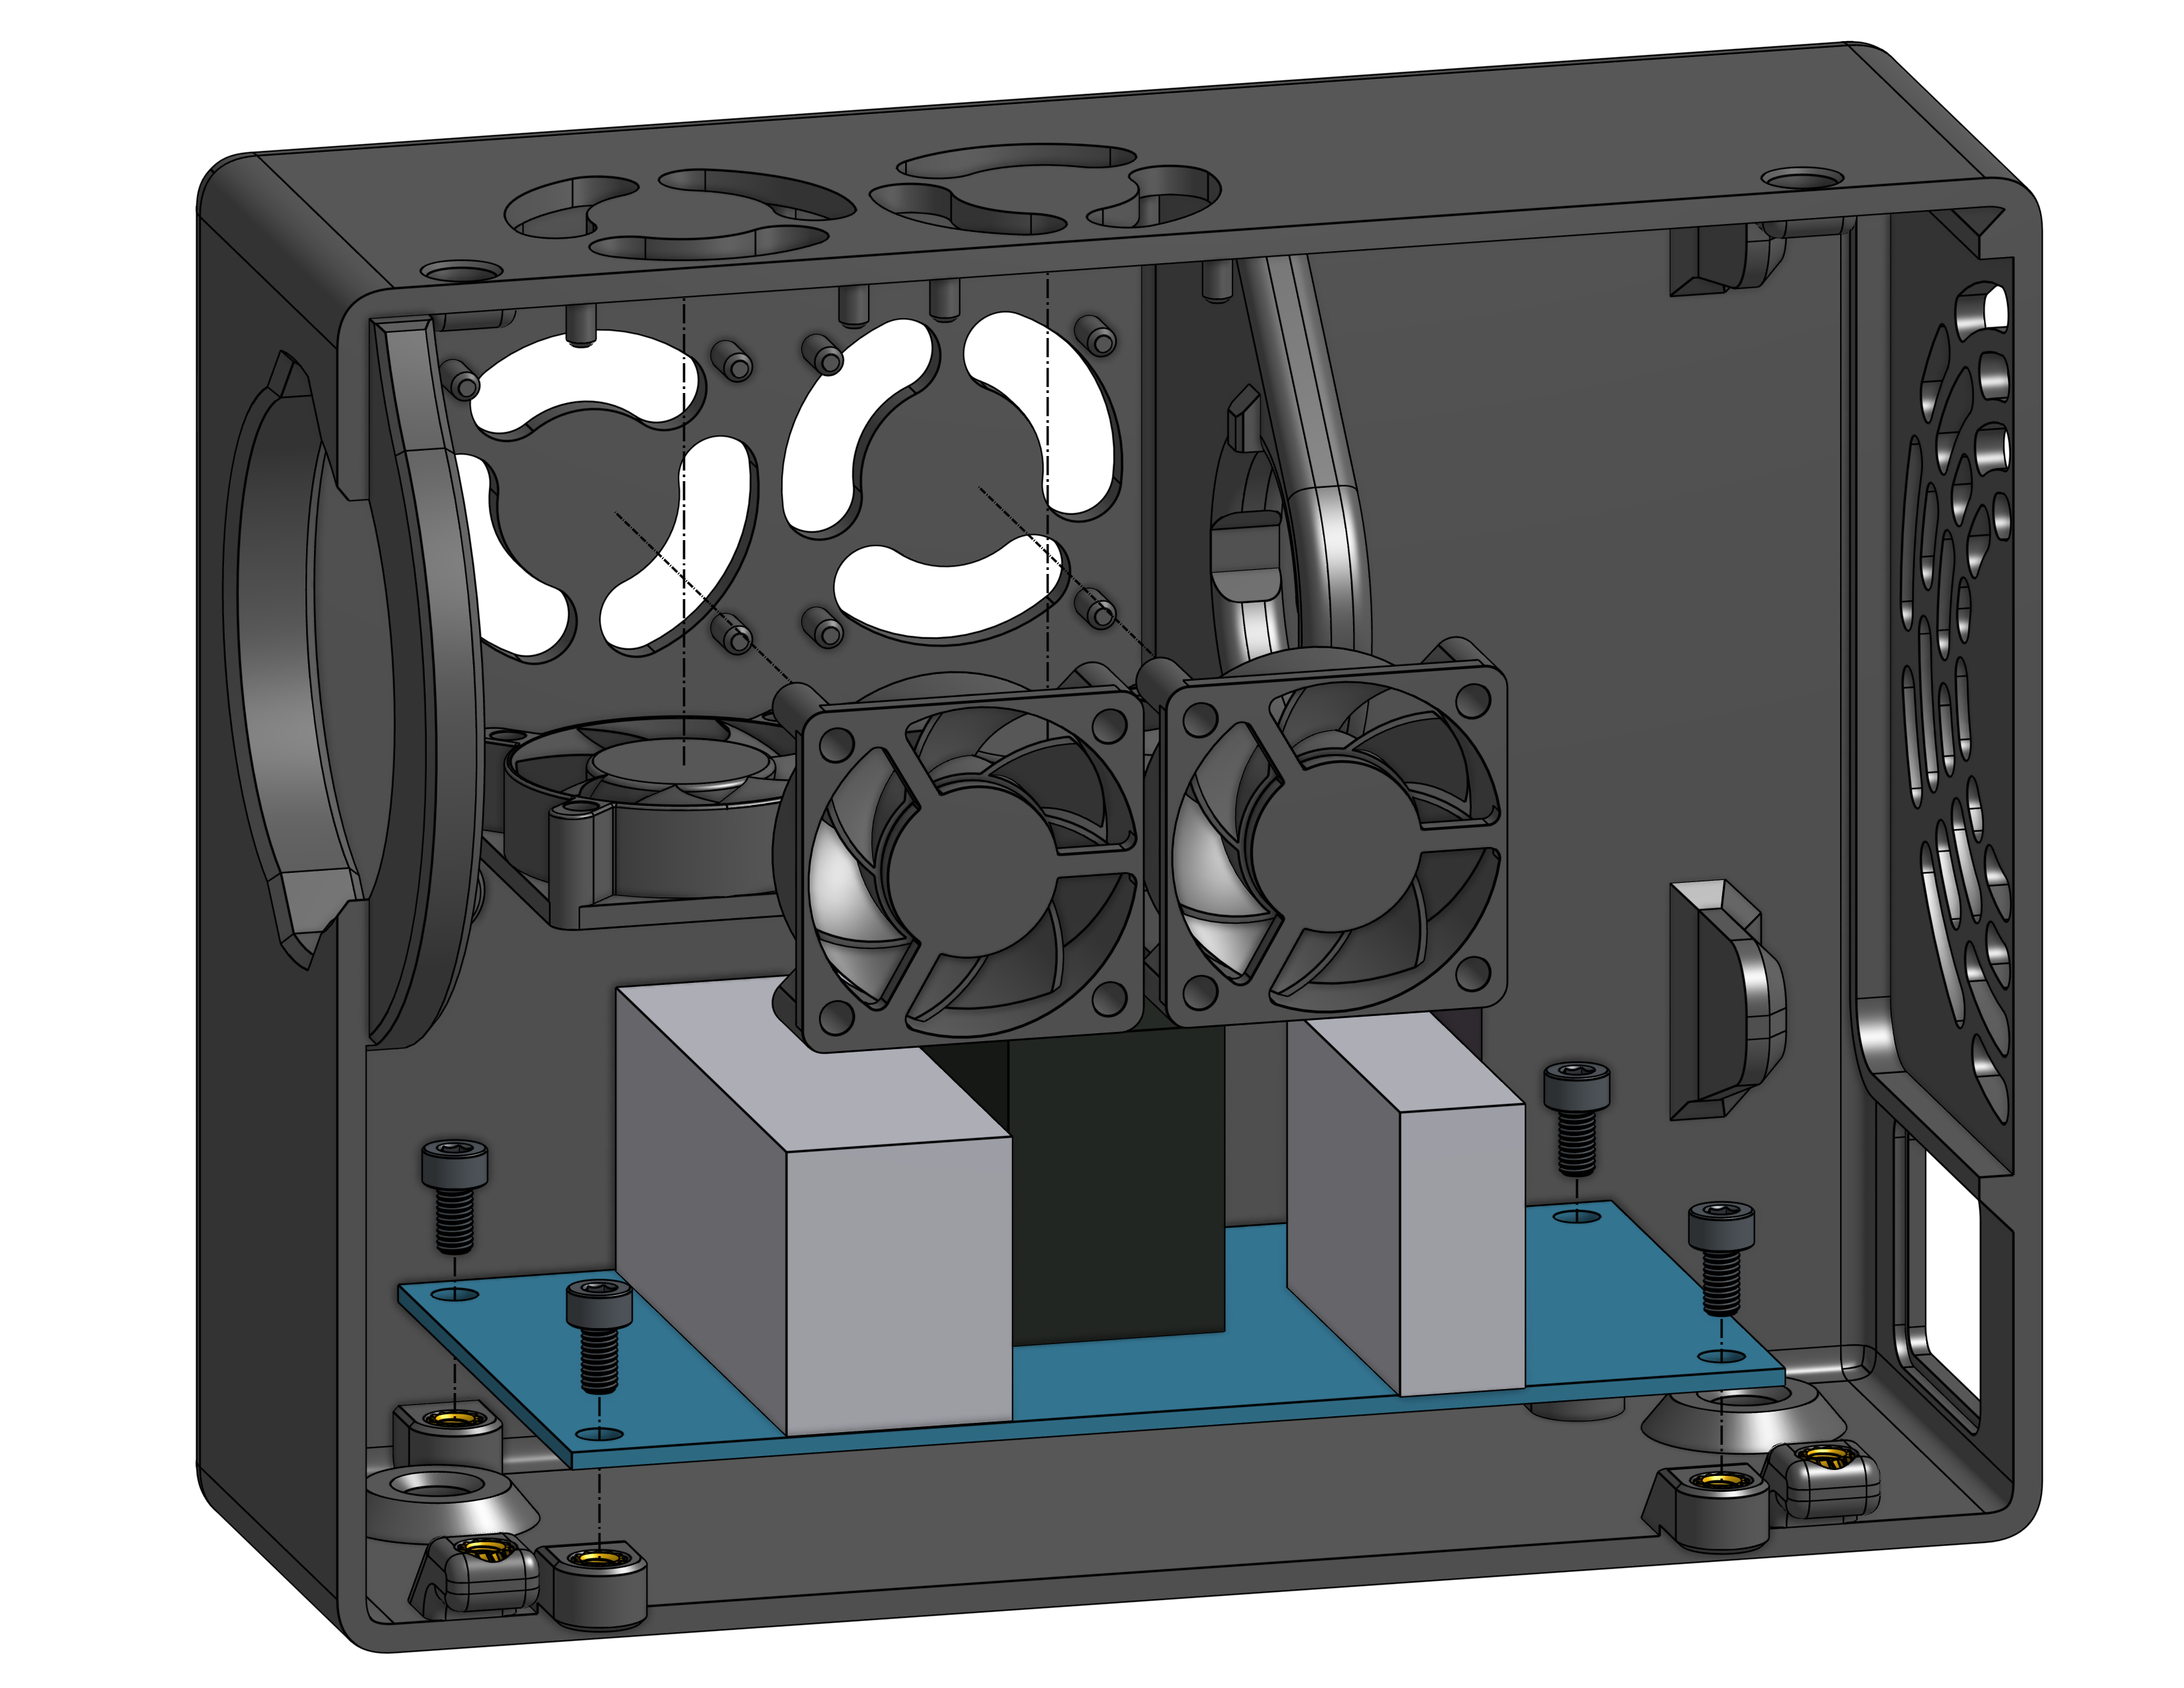
- Lots of cooling!
- Quick swap optical axis
- Fuses for safety
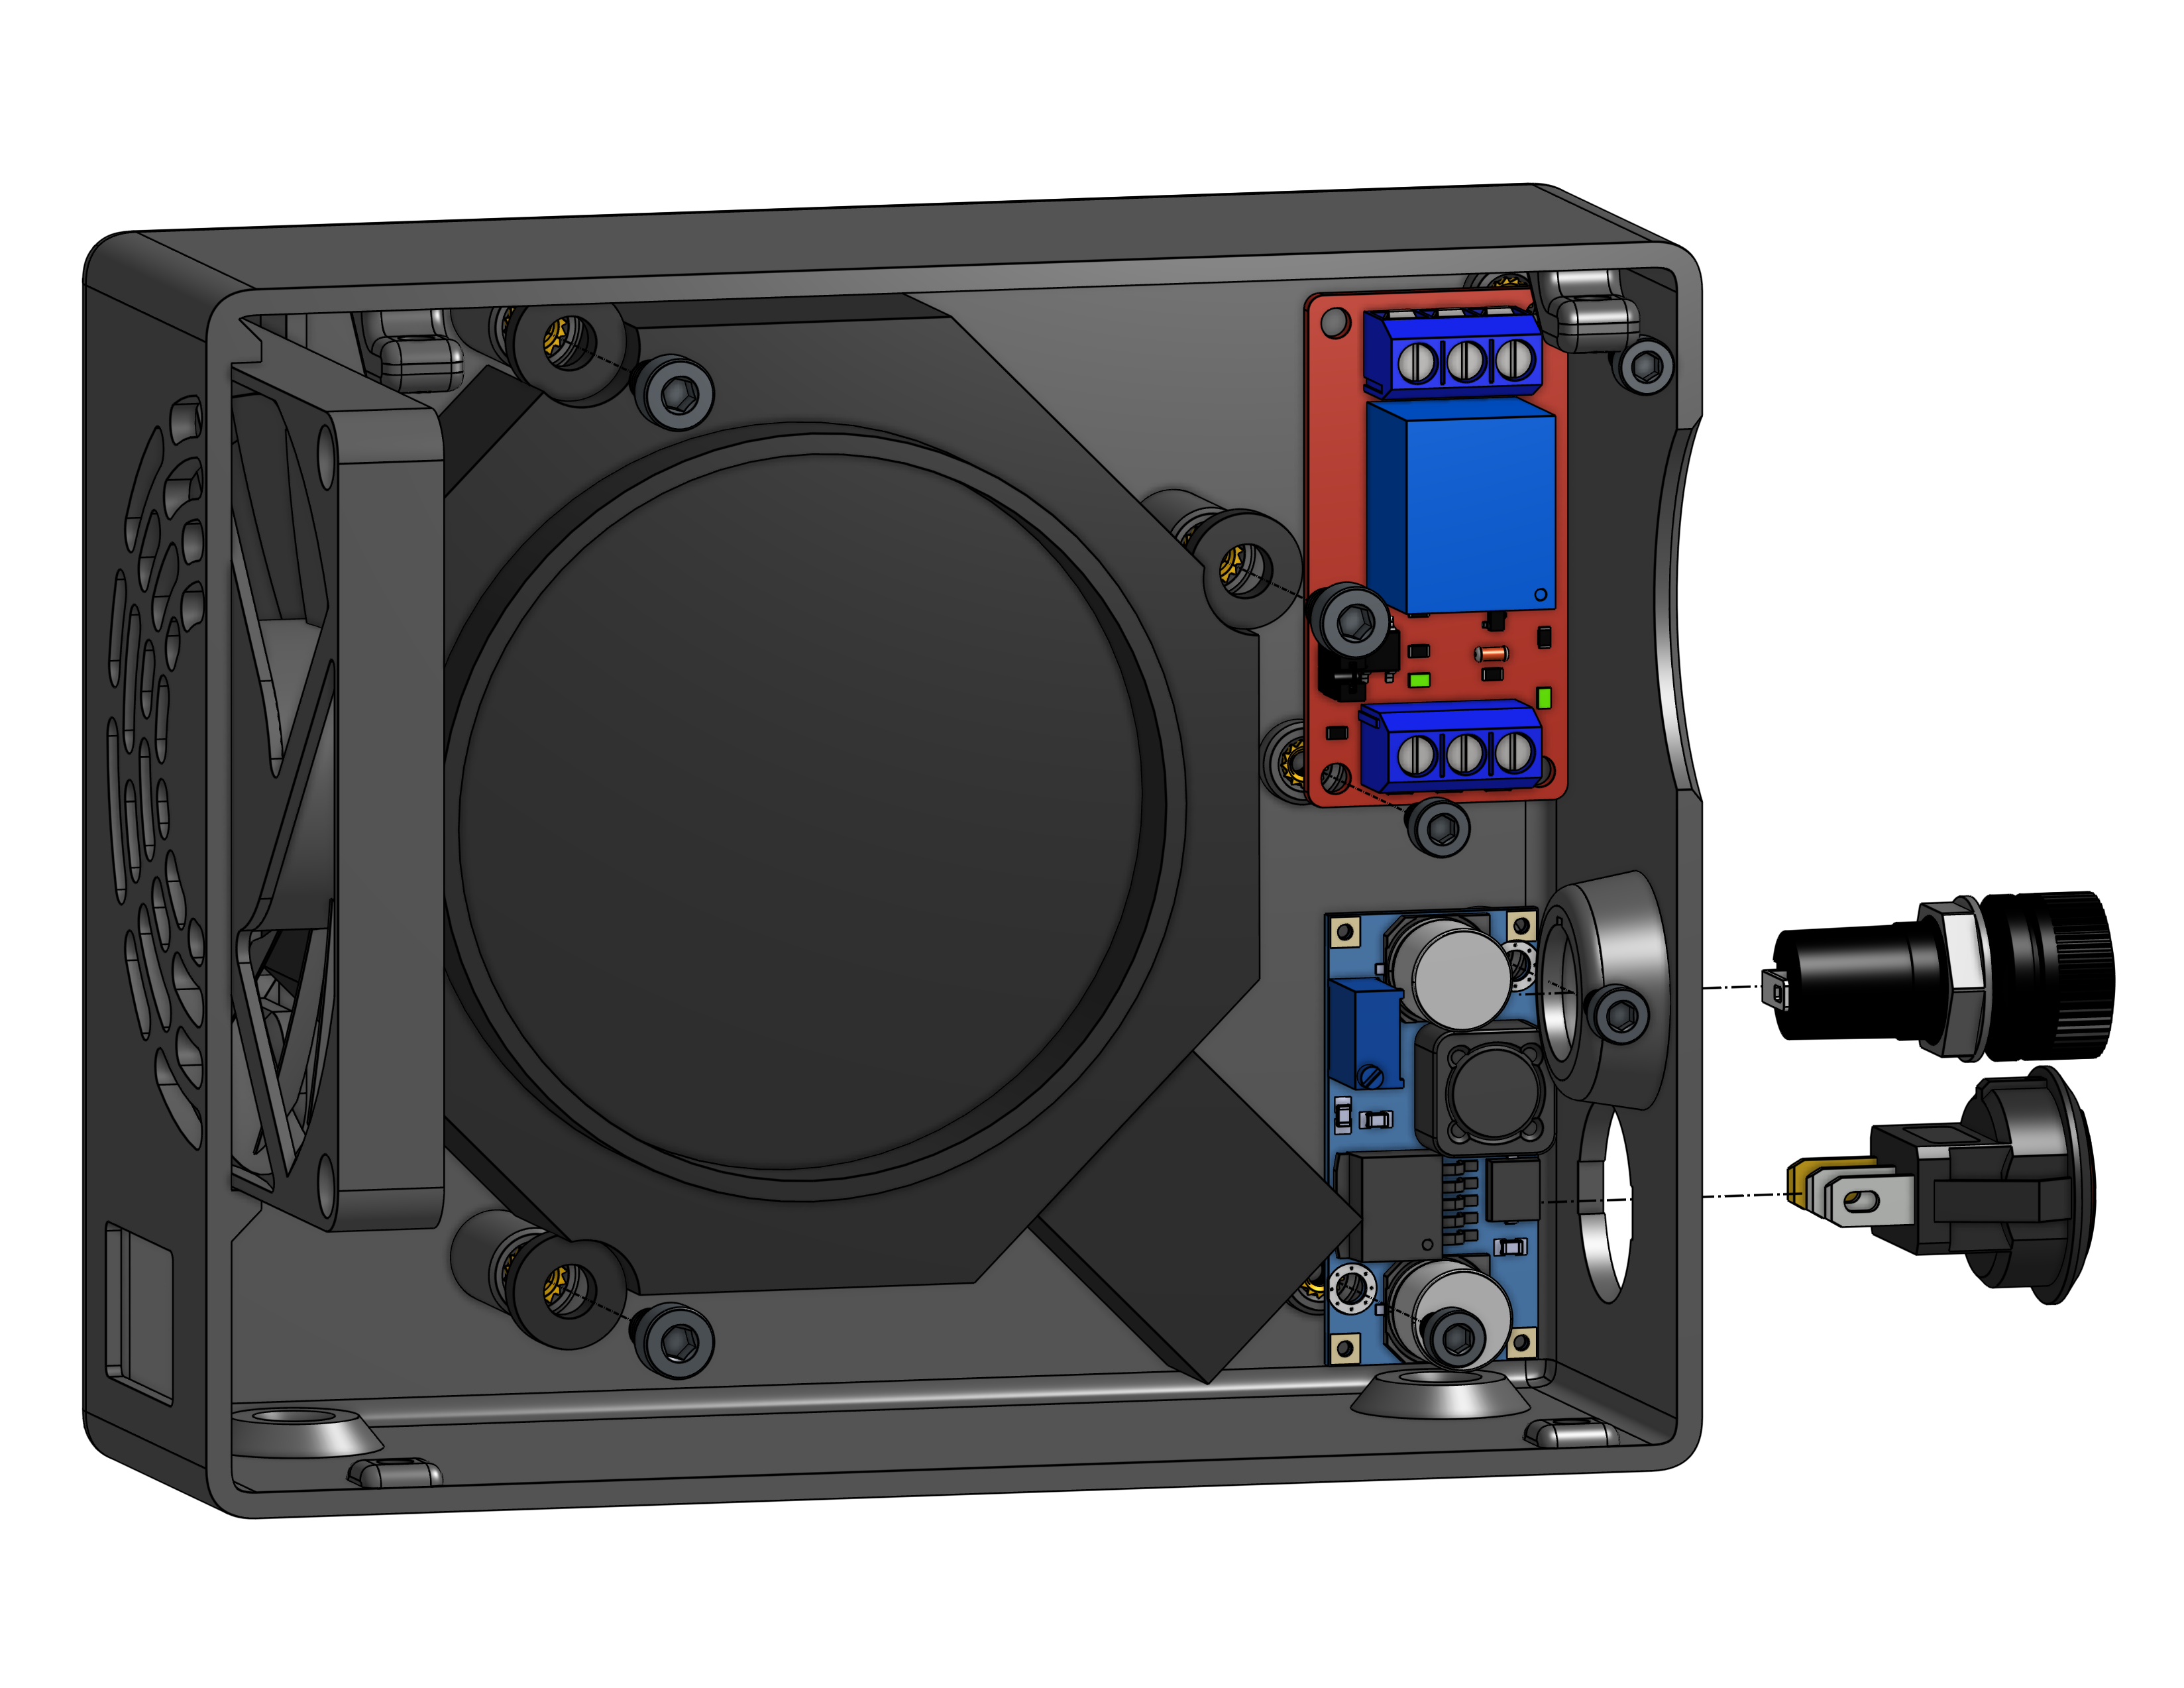
- Relay control with spring wire terminals
- TPU feet
- Easy to service case
- Support for up to 100W bulbs
Optical System
Xenon bulbs are essentially the best option for optical white light sources. They feature a continuous spectral density from 200 – 1100nm and a color reproduction index (CRI) of approximately 100% (Class E).
The light source doesn’t quite live up to that promise, but does deliver high power throughout the visible range represented below.
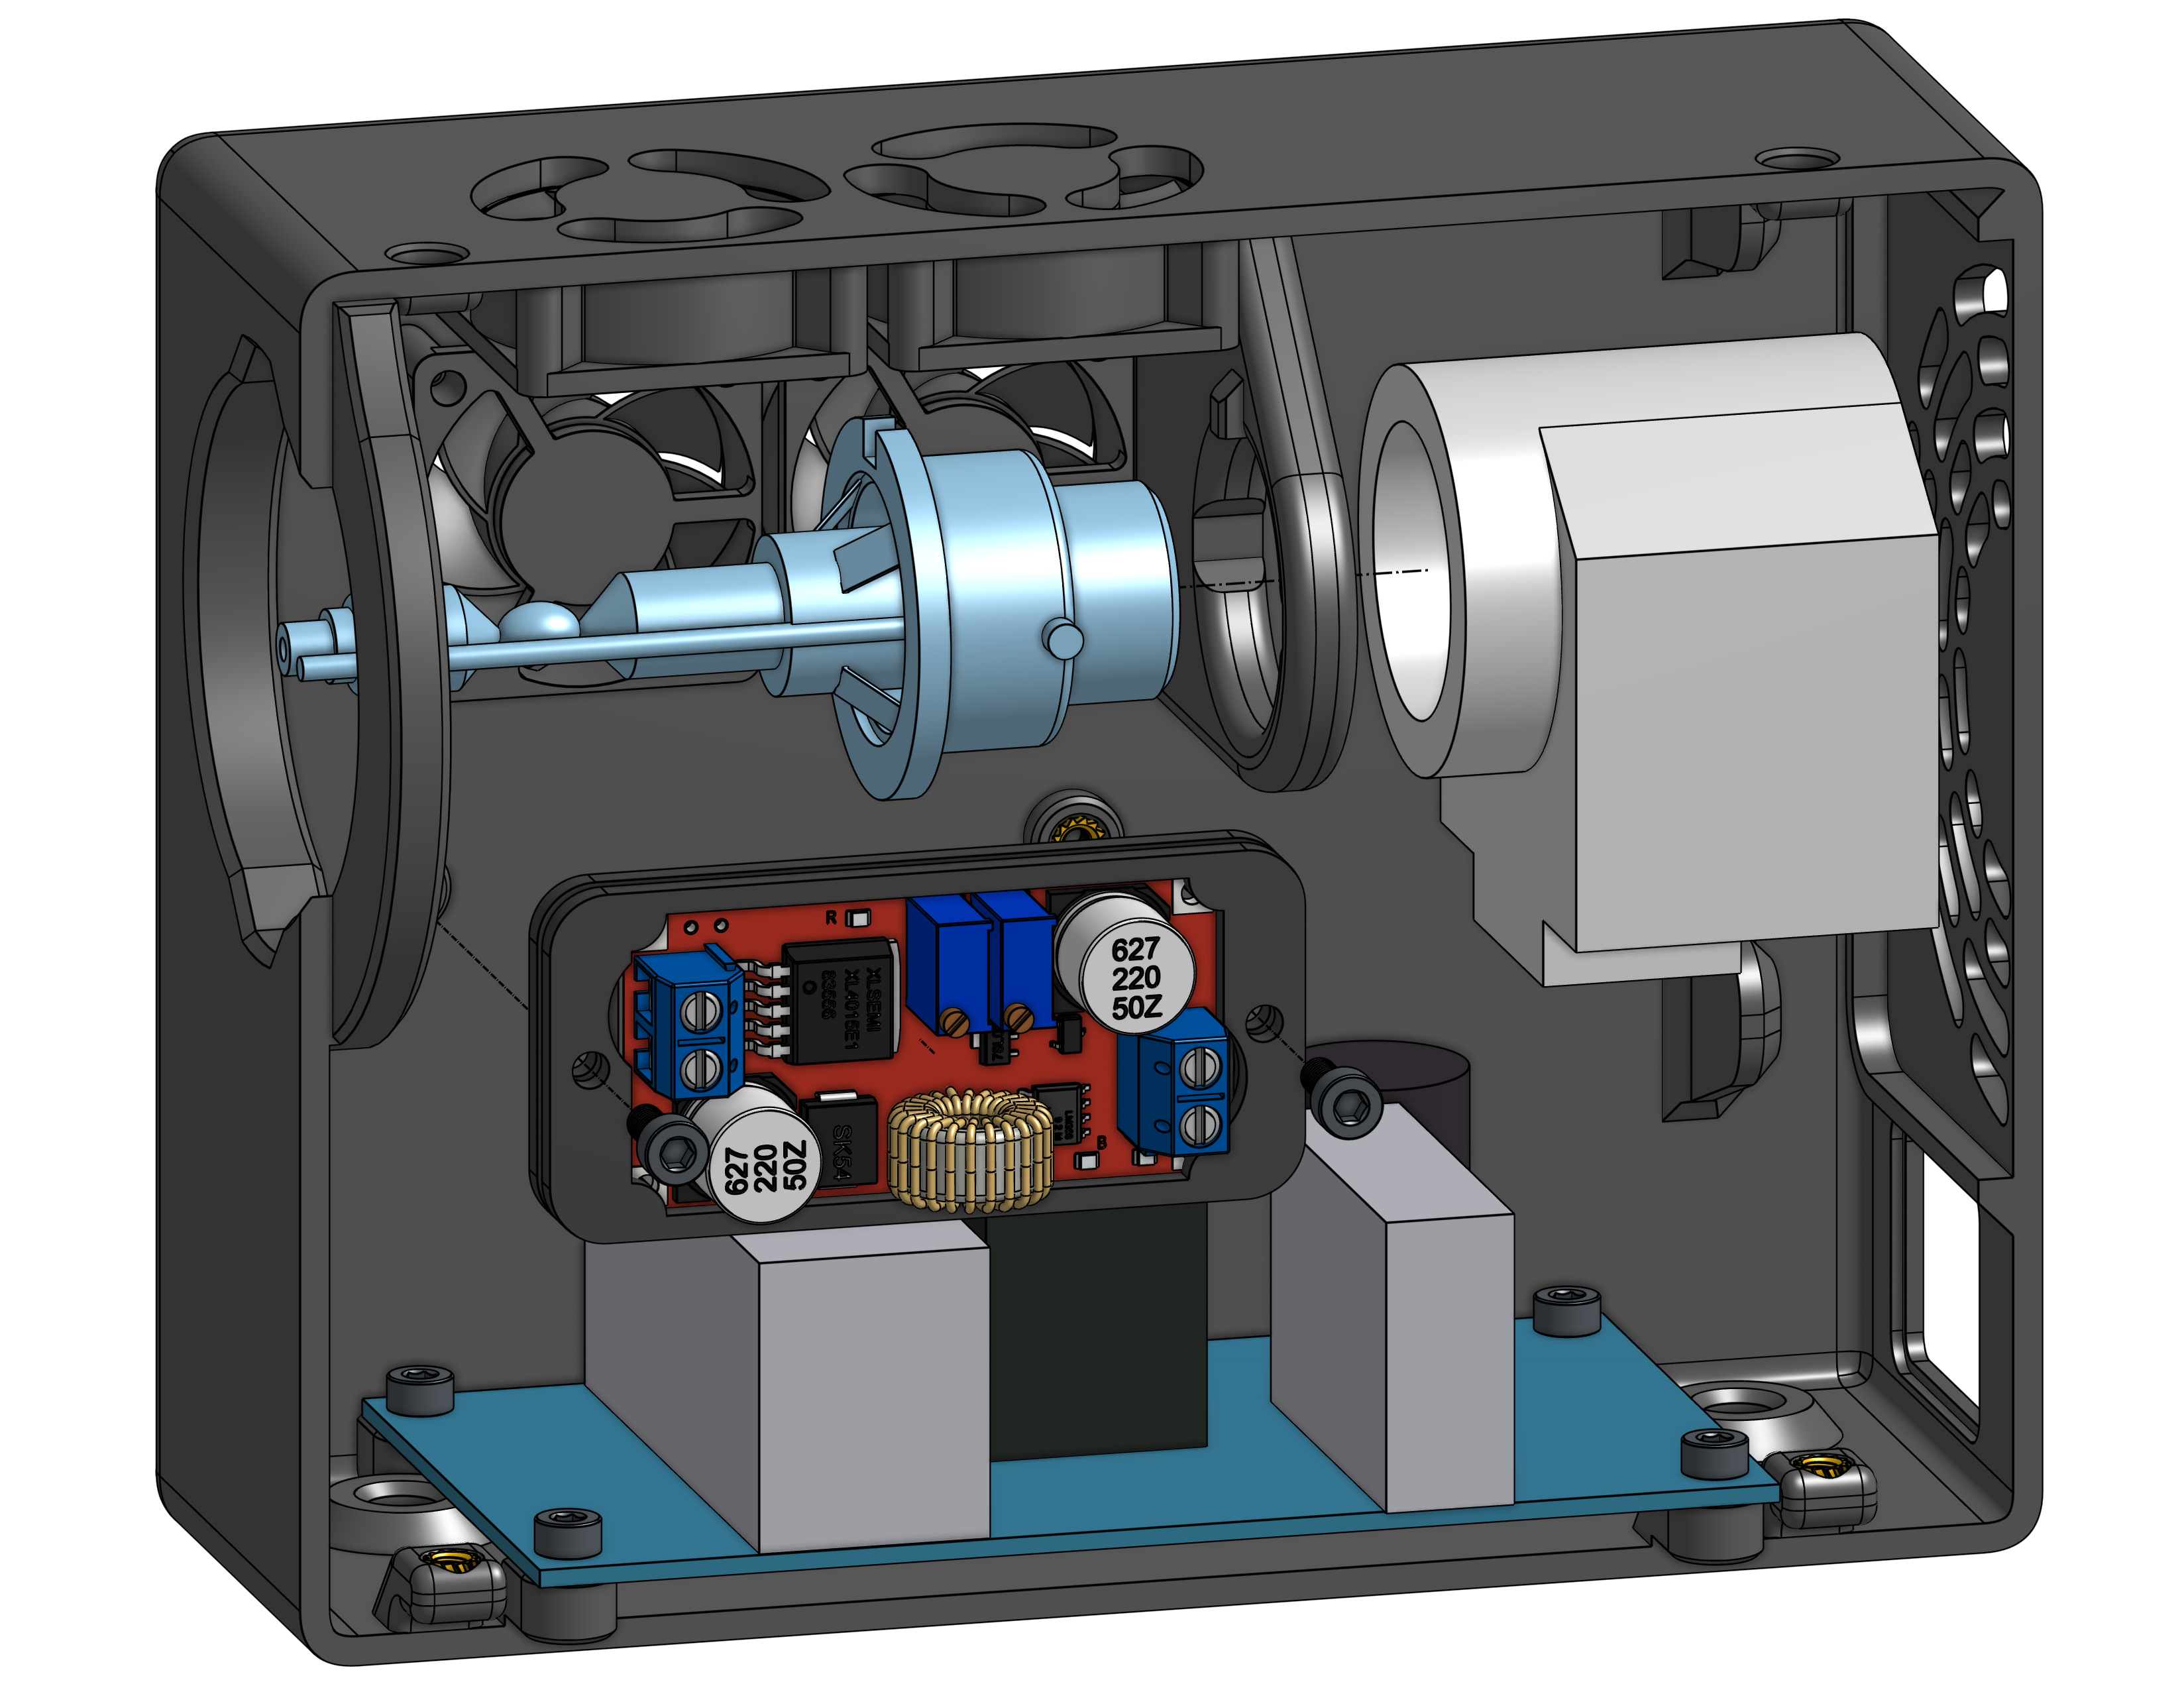
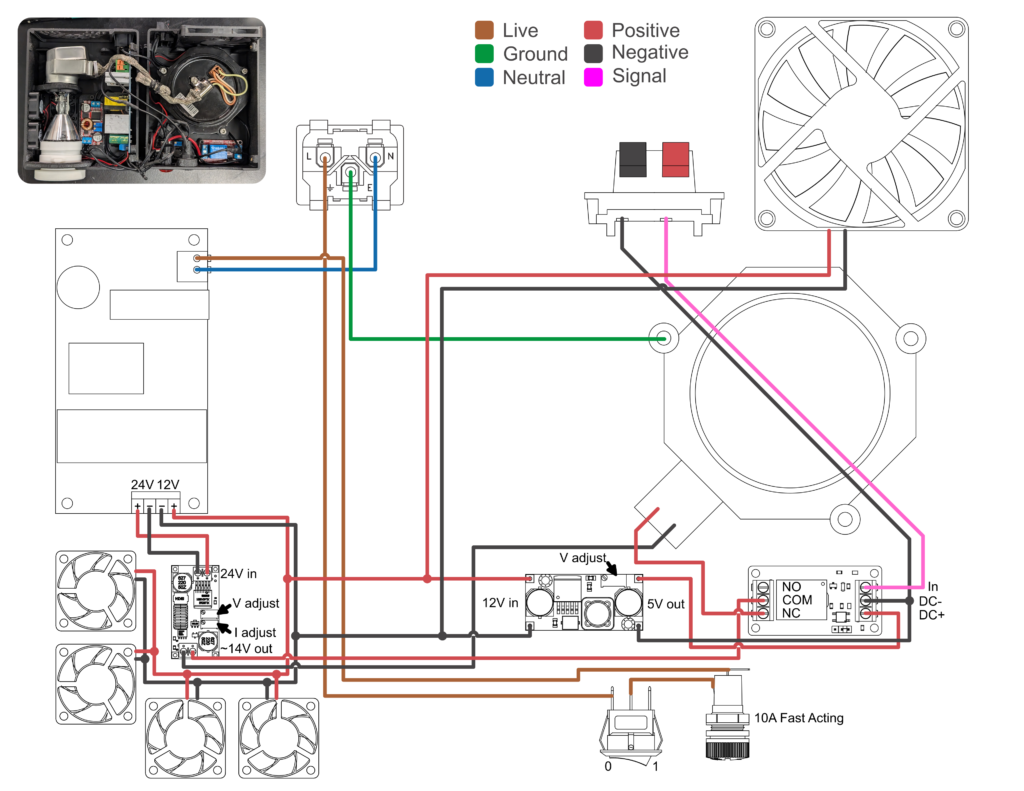
HID headlights and xenon gas discharge tubes operate by passing a high voltage between two electrodes exciting xenon gas to radiate. As a result the system uses a ballast to store up power and release a high voltage pulse, which the igniter passes to the bulb.
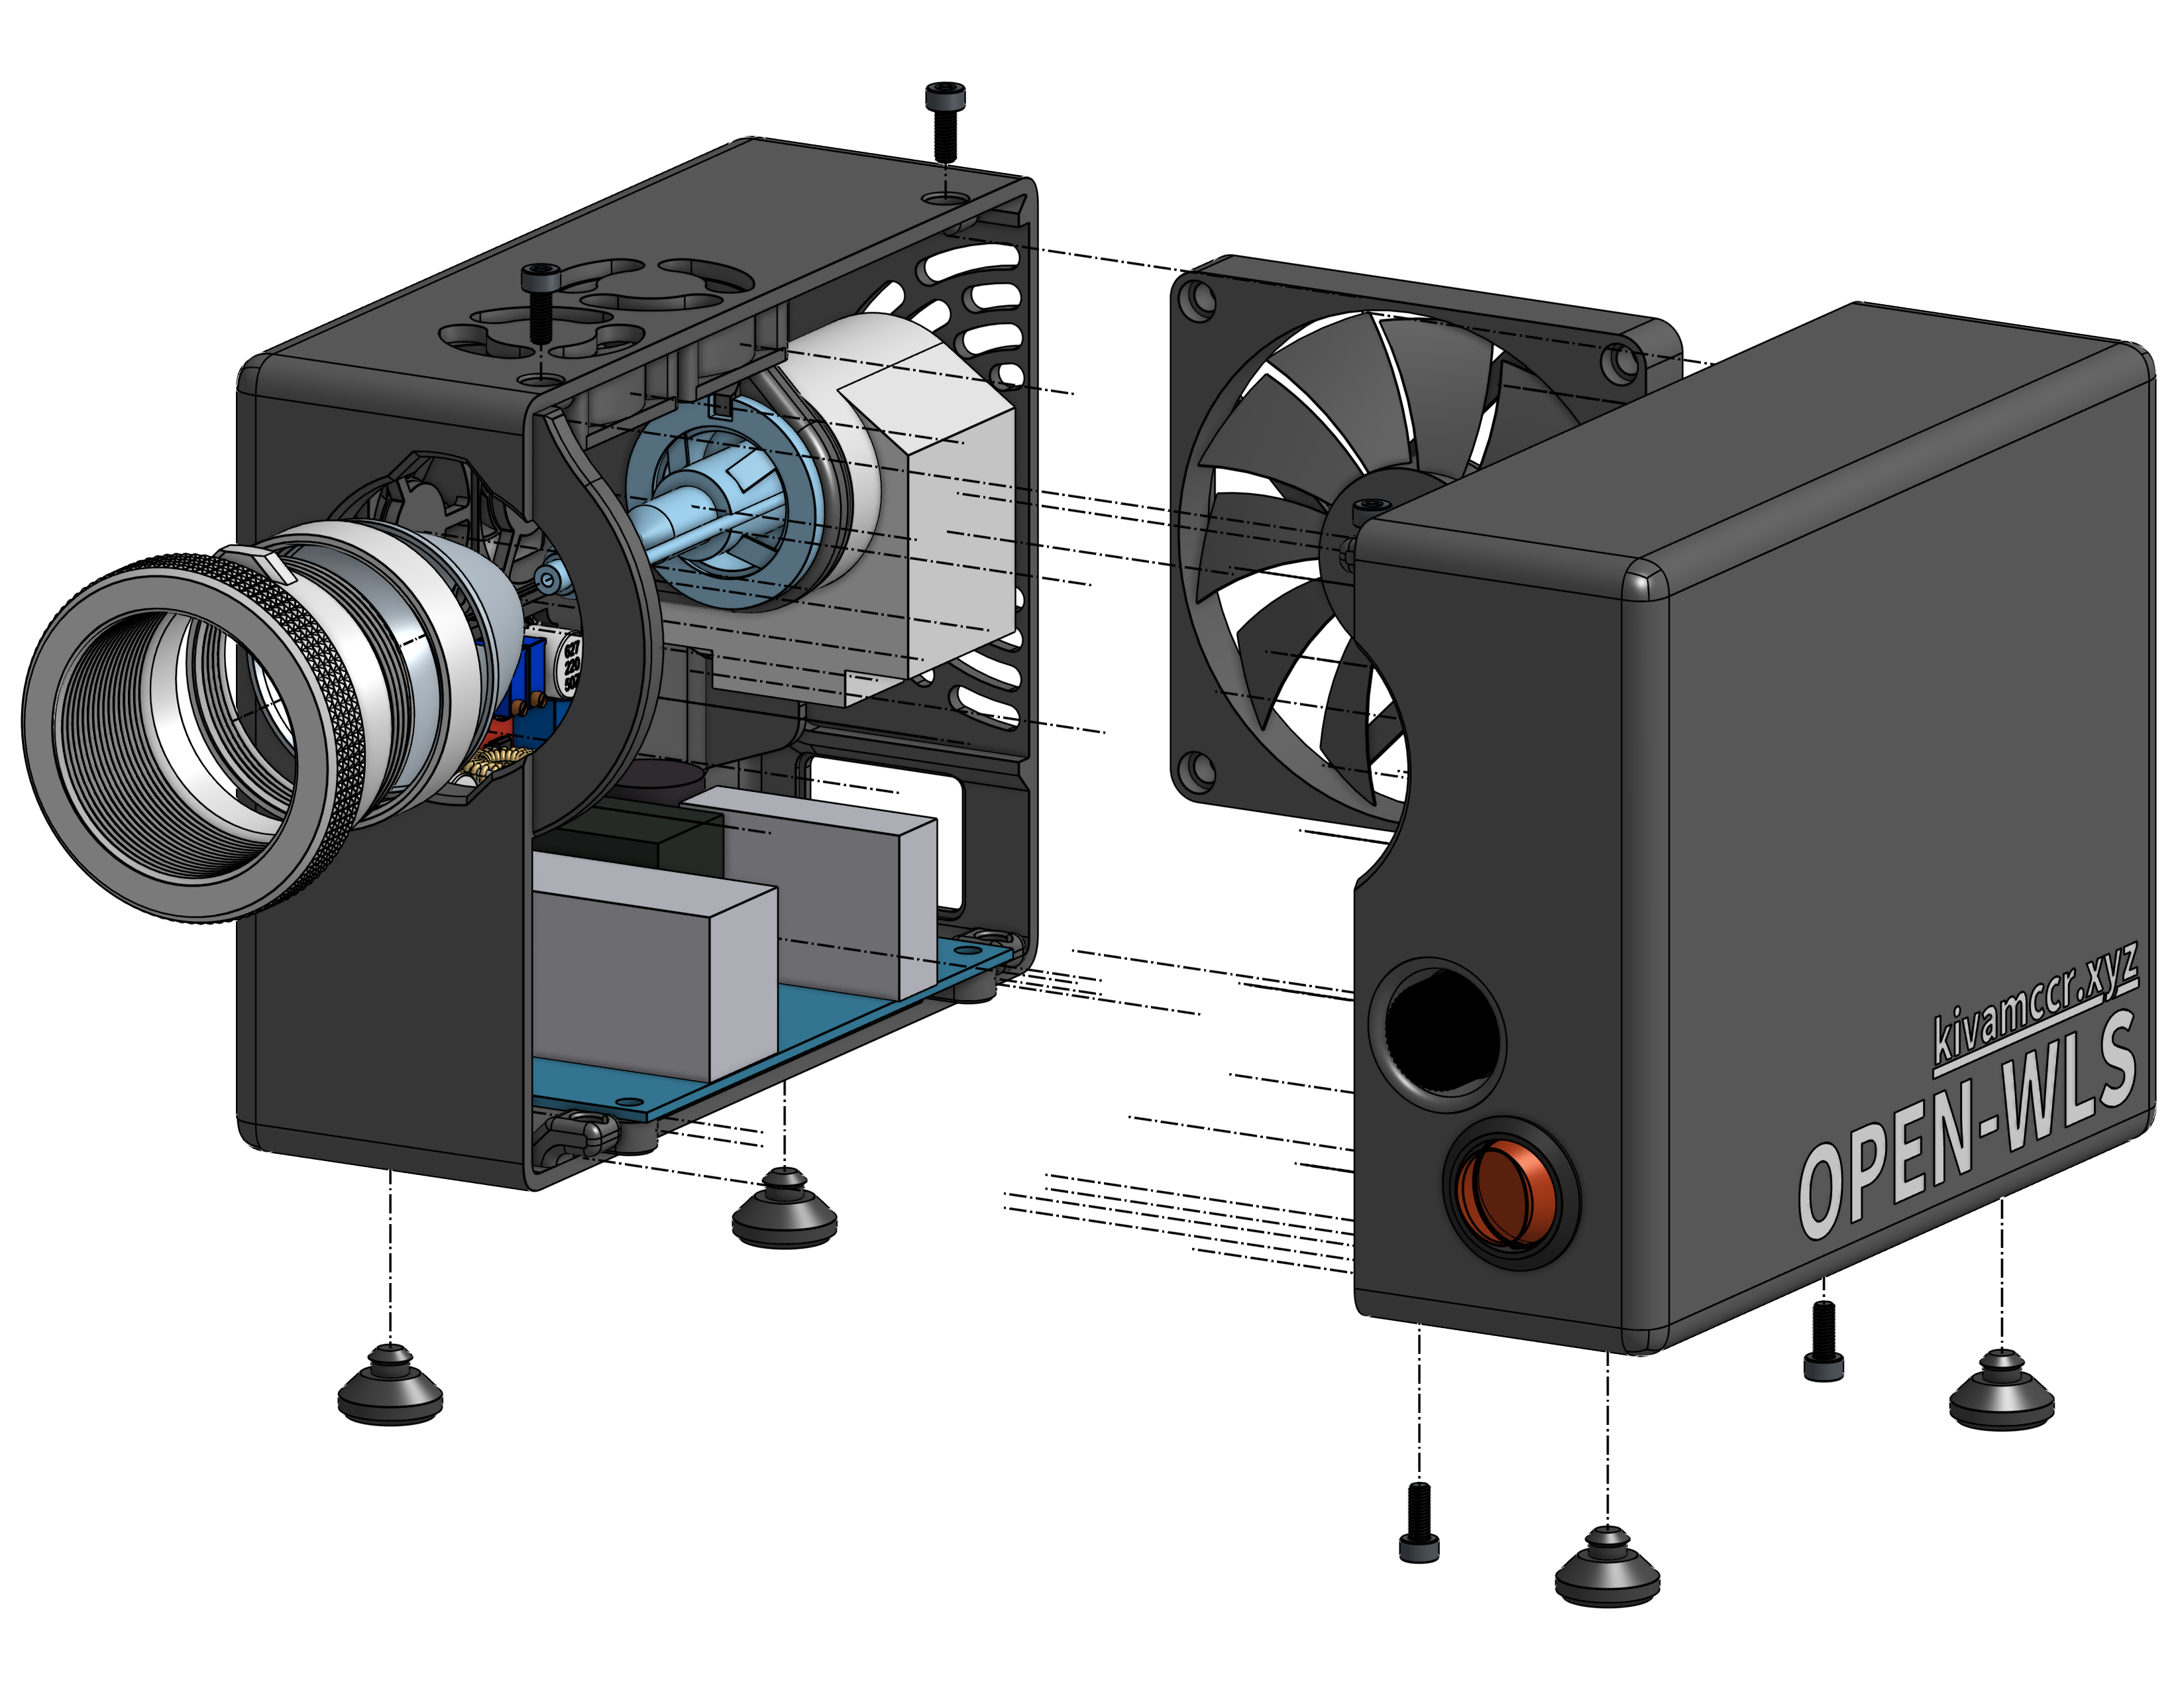
The system is designed with a hot-swappable optical axis in mind.
Most light sources simply project the light out of an aperture with no collimation. This is fine for fiber illuminators; however, most optical experiments start by collimating the light. This source takes out the middle man by using a parabolic SMO flashlight reflector. These reflectors are sub $10 and allow the relative collimation of the light, making the system far more efficient to collimate.
Mounting this reflector on a locking lens tube allows the quick swapping between different optical assemblies, that way the user can make multiple configurations and rapidly swap the system to fit experiments. For example maybe one experiment needs a high power fiber coupler, and another needs collimation.
Materials & Models
| Name / Links | Quantity | $/per | Notes |
| HID Bulb + Ballast + Igniter | 1 | 39 | D2S Bulb 35-50W |
| AC to DC Supply | 1 | 16 | 24V 4A & 12V 1A, 100W |
| XL4015 DC to DC Buck Converter | 1 | 3.5 | 5A |
| HW-803 Relay | 1 | 2 | 5V from LM2596 set to normally closed |
| LM2596 | 1 | 1.3 | Set to 5V |
| 8010 Fan | 1 | 12 | 12V from supply |
| 3010 Fan | 3 | 2 | 12V from supply |
| AC Input Plug | 1 | 0.7 | IEC 320-C14 panel snap (no 3d model) (add before last step/wiring) |
| CLIFF 2P Spring Terminal | 1 | 4.5 | Connects to HW-803, used for relay control input (no 3d model) (add before last step/wiring), glue in place |
| SPST Rocker Switch | 1 | 0.9 | On/off for system |
| 5x20mm Fuse Holder | 1 | 1.7 | 10A fast blow fuse recommended |
| SMO Reflector | 1 | 5.5 | Position arc at or behind focal point, will require modification for bulb to fit |
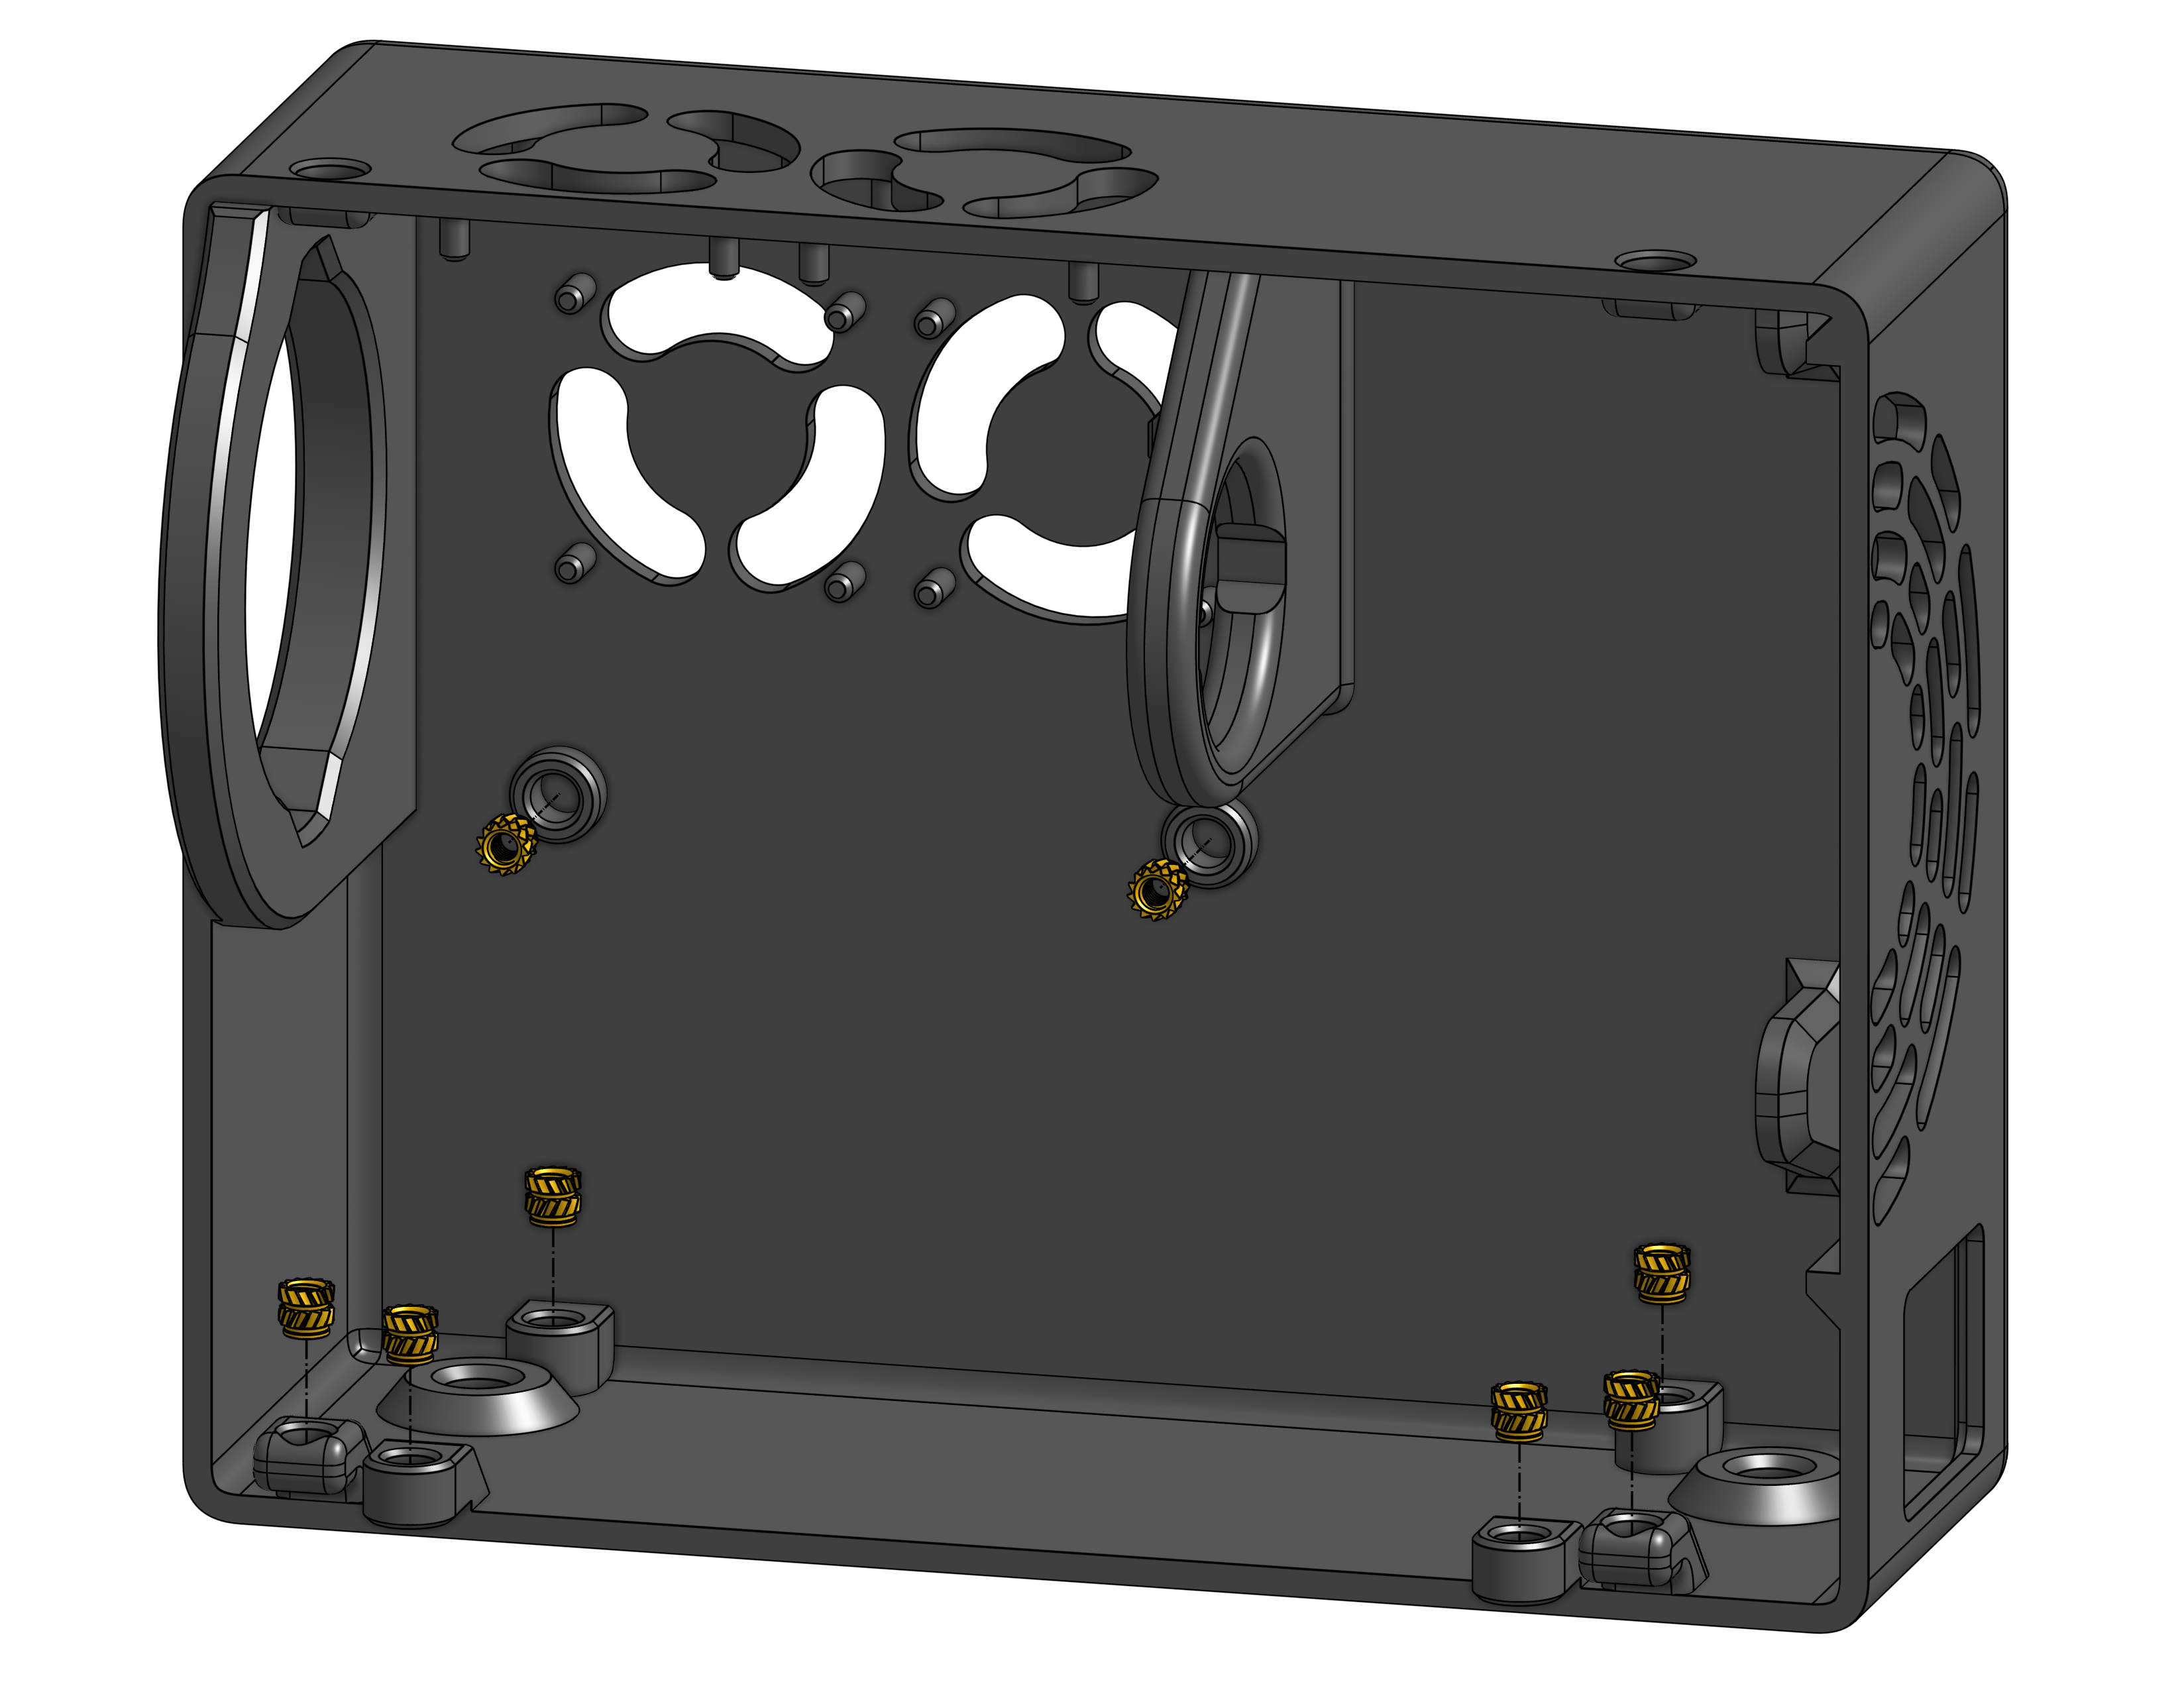
| M3-4mm Heatset | 14 | Soldering iron required to install | |
| M4-4mm Heatset | 4 | Soldering iron required to install | |
| M4-8mm Socket Bolt | 4 | Length between 8 and 18mm | |
| M3-6mm Socket Bolt | 8 | Length between 4 and 6mm | |
| M3-8mm Socket Bolt | 6 |
Construction

Safety
The bulb gets really hot and emits heavily in the UV and IR.
So don’t touch the bulb directly, and don’t look at the source directly.
It is better to work in a light room so that your pupils are more closed and less light enters from reflection.